1. Free Up Disk Space
Insufficient disk space can prevent updates from installing properly.
- Check Available Space: Open "Settings" by pressing
Windows + I, go to "System," and then select "Storage." Review the available space on your system drive (usually C:). - Free Up Space: If space is low, delete unnecessary files, uninstall unused programs, or use the built-in Disk Cleanup tool to remove temporary files and system cache.
2. Run the Windows Update Troubleshooter
Windows has a built-in troubleshooter that can automatically detect and fix update-related issues.
- Open Troubleshooter: Press
Windows + Ito open Settings, go to "Update & Security," then select "Troubleshoot." - Run Windows Update Troubleshooter: Click on "Additional troubleshooters," select "Windows Update," and click "Run the troubleshooter." Follow the on-screen instructions to complete the process.
3. Perform a Clean Boot
A clean boot helps eliminate software conflicts that might be interfering with the update process.
- Open System Configuration: Press
Windows + R, typemsconfig, and press Enter. - Disable Startup Programs: In the System Configuration window, go to the "Services" tab. Check "Hide all Microsoft services," then click "Disable all."
- Disable Startup Items: Switch to the "Startup" tab and click "Open Task Manager." Disable all startup items listed here.
- Restart Your Computer: Click "OK" in the System Configuration window and restart your computer.
After the system restarts, attempt to run Windows Update again.
4. Delete the SoftwareDistribution Folder
The SoftwareDistribution folder stores temporary files for Windows updates. Deleting it can resolve issues caused by corrupted files.
Stop Windows Update Service:
- Open Command Prompt as Administrator by pressing
Windows + Xand selecting "Command Prompt (Admin)" or "Windows Terminal (Admin)." - Enter the following command and press Enter:
net stop wuauserv
net stop bits
- Open Command Prompt as Administrator by pressing
Delete SoftwareDistribution Folder:
- Open File Explorer and navigate to
C:\Windows\SoftwareDistribution. - Delete all contents within the SoftwareDistribution folder.
- Open File Explorer and navigate to
Restart Windows Update Service:
- Go back to the Command Prompt and enter the following commands:
net start wuauserv
net start bits
- Go back to the Command Prompt and enter the following commands:
Afterward, try running Windows Update again.
5. Manually Install the Updates
If a specific update is causing the issue, you can manually download and install it.
- Identify the Update:
- Go to "Settings" > "Update & Security" > "Windows Update" > "View update history." Note the KB number of the failed update.
- Download the Update:
- Visit the Microsoft Update Catalog and search for the update using the KB number.
- Download and install the update manually.
6. Run the DISM and SFC Tools
Corrupted system files can prevent updates from installing. Running DISM and SFC tools can repair these files.
Open Command Prompt as Administrator:
- Press
Windows + Xand select "Command Prompt (Admin)" or "Windows Terminal (Admin)."
- Press
Run DISM Tool:
- Enter the following command and press Enter:
DISM /Online /Cleanup-Image /RestoreHealth
- Enter the following command and press Enter:
Run SFC Tool:
- After DISM completes, run the System File Checker (SFC) by entering this command:
sfc /scannow
- After DISM completes, run the System File Checker (SFC) by entering this command:
Allow the scan to complete, then restart your computer and try updating again.
7. Use System Restore
If the issue persists, you can use System Restore to revert your system to a point before the problem occurred.
- Open System Restore:
- Press
Windows + R, typerstrui, and press Enter.
- Press
- Choose a Restore Point:
- Follow the on-screen instructions to select a restore point dated before the update error appeared.
- Complete the Restoration:
- After the process completes, your system will restart. Attempt to update Windows again.
8. Reset Windows Update Components
Resetting Windows Update components can resolve deeper issues that standard troubleshooting cannot.
Open Command Prompt as Administrator:
- Press
Windows + Xand select "Command Prompt (Admin)" or "Windows Terminal (Admin)."
- Press
Reset Components:
- Run the following series of commands, pressing Enter after each:
net stop wuauserv
net stop cryptSvc
net stop bits
net stop msiserver
ren C:\Windows\SoftwareDistribution SoftwareDistribution.old
ren C:\Windows\System32\catroot2 catroot2.old
net start wuauserv
net start cryptSvc
net start bits
net start msiserver
- Run the following series of commands, pressing Enter after each:
Restart Your Computer:
- After completing the commands, restart your computer and try the updates again.
Conclusion
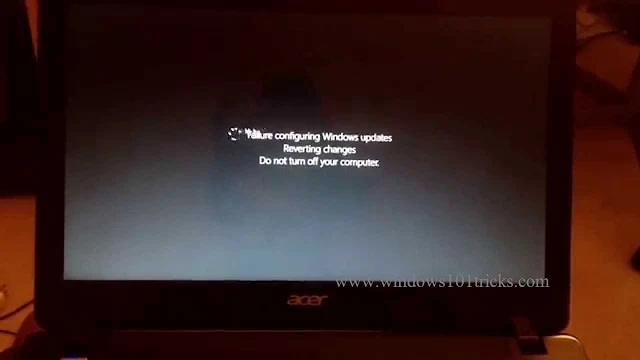
The “Failure Configuring Windows Updates, Reverting Changes” error can be disruptive, but it is often resolvable with the right approach. By following the solutions outlined in this guide, you can identify and fix the underlying issues that are preventing your system from updating successfully. Regular maintenance and staying vigilant about software conflicts can help prevent this error from occurring in the future.