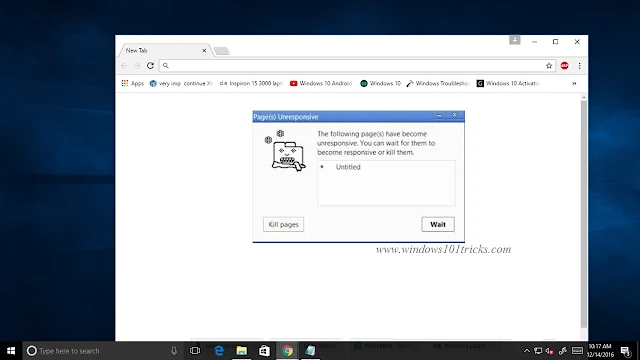
Understanding the “Kill Pages” Error
The “Kill pages” error usually appears when Chrome’s process is terminated due to excessive memory usage or other performance issues. Chrome has a built-in feature that automatically kills unresponsive or resource-intensive pages to maintain overall browser performance. However, if this feature triggers frequently, it can indicate underlying issues with your browser or system.
1. Restart Chrome
Sometimes, a simple restart can resolve temporary issues.
Close Chrome:
- Click on the “X” button in the top-right corner of the browser window or use
Alt + F4to close it.
- Click on the “X” button in the top-right corner of the browser window or use
Reopen Chrome:
- Launch Google Chrome again and check if the error persists.
2. Clear Cache and Cookies
Corrupted cache and cookies can cause performance issues in Chrome. Clearing them might help resolve the error.
Open Chrome Settings:
- Click the three vertical dots (menu) in the top-right corner and select “Settings.”
Navigate to Privacy and Security:
- Go to “Privacy and security” and click on “Clear browsing data.”
Clear Data:
- Choose “Cached images and files” and “Cookies and other site data.”
- Set the time range to “All time” and click “Clear data.”
Restart Chrome:
- Close and reopen Chrome to see if the issue is resolved.
3. Disable Extensions
Extensions can sometimes cause performance issues or conflicts in Chrome.
Open Extensions Menu:
- Click on the three vertical dots (menu) in the top-right corner and select “More tools,” then “Extensions.”
Disable Extensions:
- Toggle off each extension to disable them temporarily.
Check for Error:
- Restart Chrome and test if the error persists. If disabling extensions resolves the issue, re-enable them one by one to identify the problematic extension.
Remove Problematic Extensions:
- If you identify a problematic extension, remove it by clicking the “Remove” button.
4. Update Chrome
An outdated version of Chrome may have bugs or performance issues that are fixed in newer versions.
Open Chrome Settings:
- Click the three vertical dots (menu) and go to “Help” and then “About Google Chrome.”
Check for Updates:
- Chrome will automatically check for updates and install them if available.
Restart Chrome:
- After updating, restart Chrome to apply the changes.
5. Reset Chrome Settings
Resetting Chrome to its default settings can resolve issues caused by configuration problems or unwanted changes.
Open Chrome Settings:
- Click the three vertical dots (menu) and select “Settings.”
Navigate to Advanced Settings:
- Scroll down and click on “Advanced.”
Reset and Clean Up:
- Click on “Reset and clean up” and select “Restore settings to their original defaults.”
Confirm Reset:
- Click “Reset settings” to confirm.
Restart Chrome:
- Close and reopen Chrome to see if the error is resolved.
6. Check for System Issues
Sometimes, system-wide issues can affect Chrome’s performance.
Check for System Updates:
- Ensure your operating system is up to date with the latest patches and updates.
Run System Diagnostics:
- Use built-in diagnostic tools to check for and fix any system issues.
Check RAM and Performance:
- Ensure your computer has enough free RAM and is not overloaded with running processes. Consider closing unnecessary applications or upgrading your hardware if needed.
7. Reinstall Chrome
If all else fails, reinstalling Chrome can resolve persistent issues.
Uninstall Chrome:
- Go to “Control Panel” or “Settings” and select “Apps” or “Programs and Features.”
- Find Google Chrome, select it, and click “Uninstall.”
Delete Remaining Files:
- After uninstalling, delete any remaining Chrome-related files in the following directories:
%LOCALAPPDATA%\Google\Chrome%APPDATA%\Google\Chrome
- After uninstalling, delete any remaining Chrome-related files in the following directories:
Reinstall Chrome:
- Download the latest version of Google Chrome from the official website and install it.
Set Up Chrome:
- After reinstalling, set up Chrome and check if the issue persists.
Conclusion
The “Kill pages” error in Google Chrome can be caused by various issues, including corrupted cache, problematic extensions, or system performance problems. By following these troubleshooting steps—restarting Chrome, clearing cache, disabling extensions, updating Chrome, resetting settings, checking for system issues, and reinstalling Chrome—you can effectively address and resolve the error. If the problem continues despite these efforts, consider seeking additional help from Google Chrome Support or forums for more advanced troubleshooting.

Comments
Post a Comment